So I think that I've maybe done a tutorial before but I'm not entirely sure. If I did, it certainly wasn't very memorable. :) That being said...here is a tutorial on one of my very most favorite things to make...TOTE BAGS.

There are a few reasons why I love making this. First...it doesn't cost very much to make...especially if you utilize 40% off coupons like I do. I basically never buy anything full price if I can help it. Second...this is a really easy project that you can whip out in an evening, no problem. Third, tote bags are just super versatile. Gym, groceries, diaper bag, purse...whatever you want. Fourth, I love mixing and matching prints and this gives you that option. :) Oh yay.
This tutorial will also reveal a few things about ME! 1) My belly is a professional photo bomber. 2) I have long toes. 3) I have amazing taste when it comes to ironing boards. 4) I have very little photography skills. 5) My workspace is not always no tidy, ahem. Continue on to see what I mean. ;)
So...let me tell you how to make a bag that every woman should have oh...at least 5 of.
Ready?!?
Here we go.
By the way...this tute is a little long but dare I say...thorough?!? If you have any questions feel free to ask in the comments section and I will try to answer you back.
Oh! And do you WANT this bag?!? Well, I'm doing a giveaway at the bottom so...make sure you leave a comment to enter!

First you will need (or I used):
1/2 yd each of canvas fabric for the outside (you can do two different types or just one pattern...either way. if you do one pattern instead then you will obviously need 1 yard of it)
1 yard of coordinating cotton fabric for lining
about 1 1/2 yards of webbing for the straps
3/4 yard of fleece batting (not too thick)
The great thing about this project is that you can make it any size that you would like. I made this tote bag slightly oversized. It measures 14 x 18 in. If you would like a smaller or larger bag just cut your fabric accordingly.

So first you need to cut two equal rectangles. This will be the "top portion" of the outside of your bag. I cut mine 18 x 13 inches.

Then you need to cut one larger rectangle for the bottom. I cut mine 18 x 16 inches. To give you an idea of how this works eventually this piece will be folded in half to create the "bottom portion" of the outside of the bag...as shown below.


So now you have 3 rectangle pieces of your cotton canvas fabric.

You are now going to line the edges up, print side facing each other and sew all three of them together. The bottom portion (the print you only cut one larger rectangle for) is going to be in the middle when you are done...as shown below.

Now iron those seams you made! :) (I am SUCH a lazy sewer but I have learned that ironing seams makes all the difference. So don't be lazy. Just do it!)

Ok, so now you have your three pieces sewn together with nice, flat, ironed seams, am I right?!?

Now it's time for the fleece batting. :) Make sure you have enough...good. Now this is super confusing but I'm too lazy to go back and take another picture...and it's already made sooooo...yeah. The picture above for whatever reason shows the print down. You want the print UP! So, I flipped my three pieces of sewn cotton canvas so I could see the print and then pinned it to the fleece batting...as shown below.

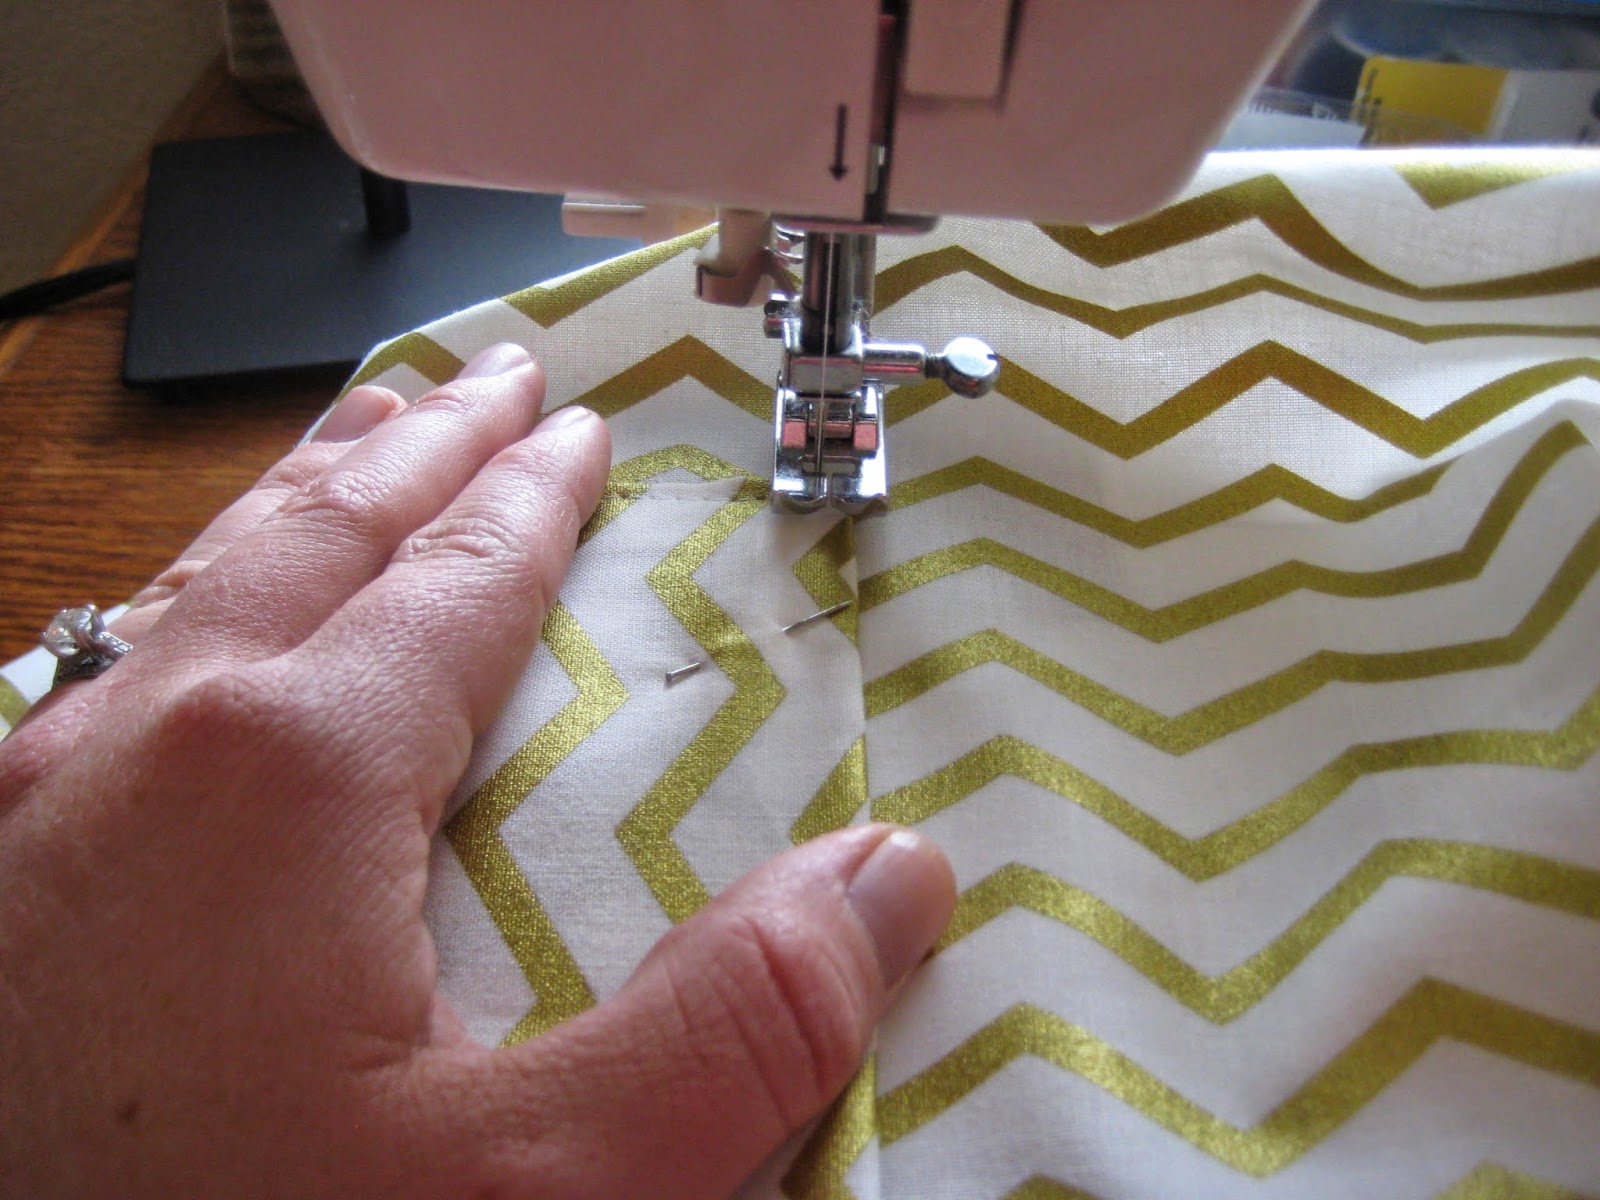
Now you are going to take your canvas that is pinned to your batting and make two seams. One on each side of your middle canvas piece. Right where my finger is pointing below.

And here I am sewing that seam. :)

And here is the completed seam. Now you are going to do this on both sides of the middle cotton canvas piece (if you are totally confused scroll down a couple of pics to see what I mean)

Once you are done with those two seams you want to sew the ends closed of your super long rectangle. As shown below. And then do it on the other side also.

Now you have this long piece of cotton canvas that you have sewn to your fleece batting in these 4 spots...see picture below.

Now you are going to fold this in half as I am doing below so that you can see the batting.

Folded in half! :)

With the fold on the bottom you will sew along each side of this so that you have an open top. So looking at this photo above, the fold is on the bottom. You will sew along the left and right edge of this rectangle...leaving the top open. Sewing demonstrated below. ;p

When you are done you basically have a big envelope type thing with an open top...as seen below.


Okay, now I would say this next part is the most tricky. So you have this flat rectangle envelope type thing but in order to have a tote bag with a flat bottom you have to create a box corner. Once you get it, it's easy. It's just kind of hard to demonstrate in a picture. If you get confused I'm sure there are plenty of youtube videos showing it.

So this is one of the bottom corners of your "flat envelope" that you want to create a flat bottom from. Basically I stick my arm into the bag with that seam facing me and then flatten it out so it makes a triangle-like corner as shown below.


Then you will want to sew a seam across that. How far you sew from that "bottom point" will effect how deep your bag is. If you wanted a really deep basket type container you would sew farther up. If you want a bag I tend to make a seam about 3 inches from that bottom point.

Once you have done that you will cut off the excess as shown below.

I keep that "cut off" triangle for reference because you will do the exact same thing on the other "point"...and on your lining.

Here I am using it as a reference...making sure they are about equal. You don't want a lopsided bag. :)


Okay, so you have done both bottom corners and created your flat bottom. Now your bag should look like THIS.


Now turn your bag right side out. Hey, hey now...it's starting to look like a tote bag! :) And please pardon the side ways picture. I cannot figure out how to flip it worth beans. Soooo annoying.

Now we are going to add the straps. Cut your strap piece in half and pin it like so. Make sure there is a little extra left at the top. Also make sure they are evenly placed on both sides of your bag. Also make sure that the strap is flipped the right way so that it will sit on your shoulder nicely.

Sew those bad boys on!

Cut off the excess.

Now your bag looks like this! (again, the sideways pic. grrrr.)

Now onto the lining. So, you want one long rectangle piece that will roughly match that original rectangle piece that you made with the three pieces of canvas cotton. So, I had two teal pieces measuring 18 x 13 inches each and the middle black dot piece measuring 18 x 16 inches. Adding those pieces up I want my lining to then be about 18 x 42 inches. Make sense?

So here is my long piece of 18 x 42 inch lining fabric folded in half.

Now this is optional but I love big bags as long as there is a place for things like keys, binkies, and cell phone. Otherwise...big bags are not so fun. Nobody likes digging for keys with a squirmy toddler in their arms. So, next, I made a pocket for the inside of the bag.
I cut a square of the lining fabric. I made it about 11 x 10 inches. Then I folded over the "top" of the pocket twice and ironed it down...then sewed along that...as shown below.


Next I made one crease (you can do a double if you are an overachiever ;) ) on the other three sides of the "pocket" as shown below.

Then pin the pocket onto the piece of the lining. I like to do it towards the top edge. Note: the belly.


Sew the pocket on!
Now you have THIS...with a handy dandy pocket sewn on.

Fold that piece in half so that the wrong side of the fabric is facing you...as shown below.

Now you are going to make one long seam up one side and then a seam, leaving an open hole, on the other side. Make sure you backstitch as you are going to use this hole to turn the whole bag right side out. Basically the bag needs to birth itself through this hole soooo...be kind to it. I think I have birth on the mind. ;) This is demonstrated in the picture below.

Next you are going to want to create that same box corner that you did with the canvas. If you kept your little triangles you cut off you can use them for reference to make sure that you do about the same thing on your lining...since it needs to fit nicely into your bag.


Now turn the "outside" part of your bag with the straps and batting inside out...as shown below.

And make sure your lining is facing out so that you can see that lovely print. :)

Now place the lining into your inside out bag...so that the prints are facing each other...and so that the straps are tucked inside the bag between the canvas and the lining.

So when you look into the bag you should see the wrong side of the lining.

Stick your arm in and make sure that the bottom of your lining is sitting/fits nicely with the outside canvas part of your bag.

Then pin around the top edge. I always have a little extra lining at the top which I cut off.


When it's all pinned around the top...sew those two layers together. You made a seam a while back. Sew just below that so that you can't see that first seam.

And cut off the excess fabric.

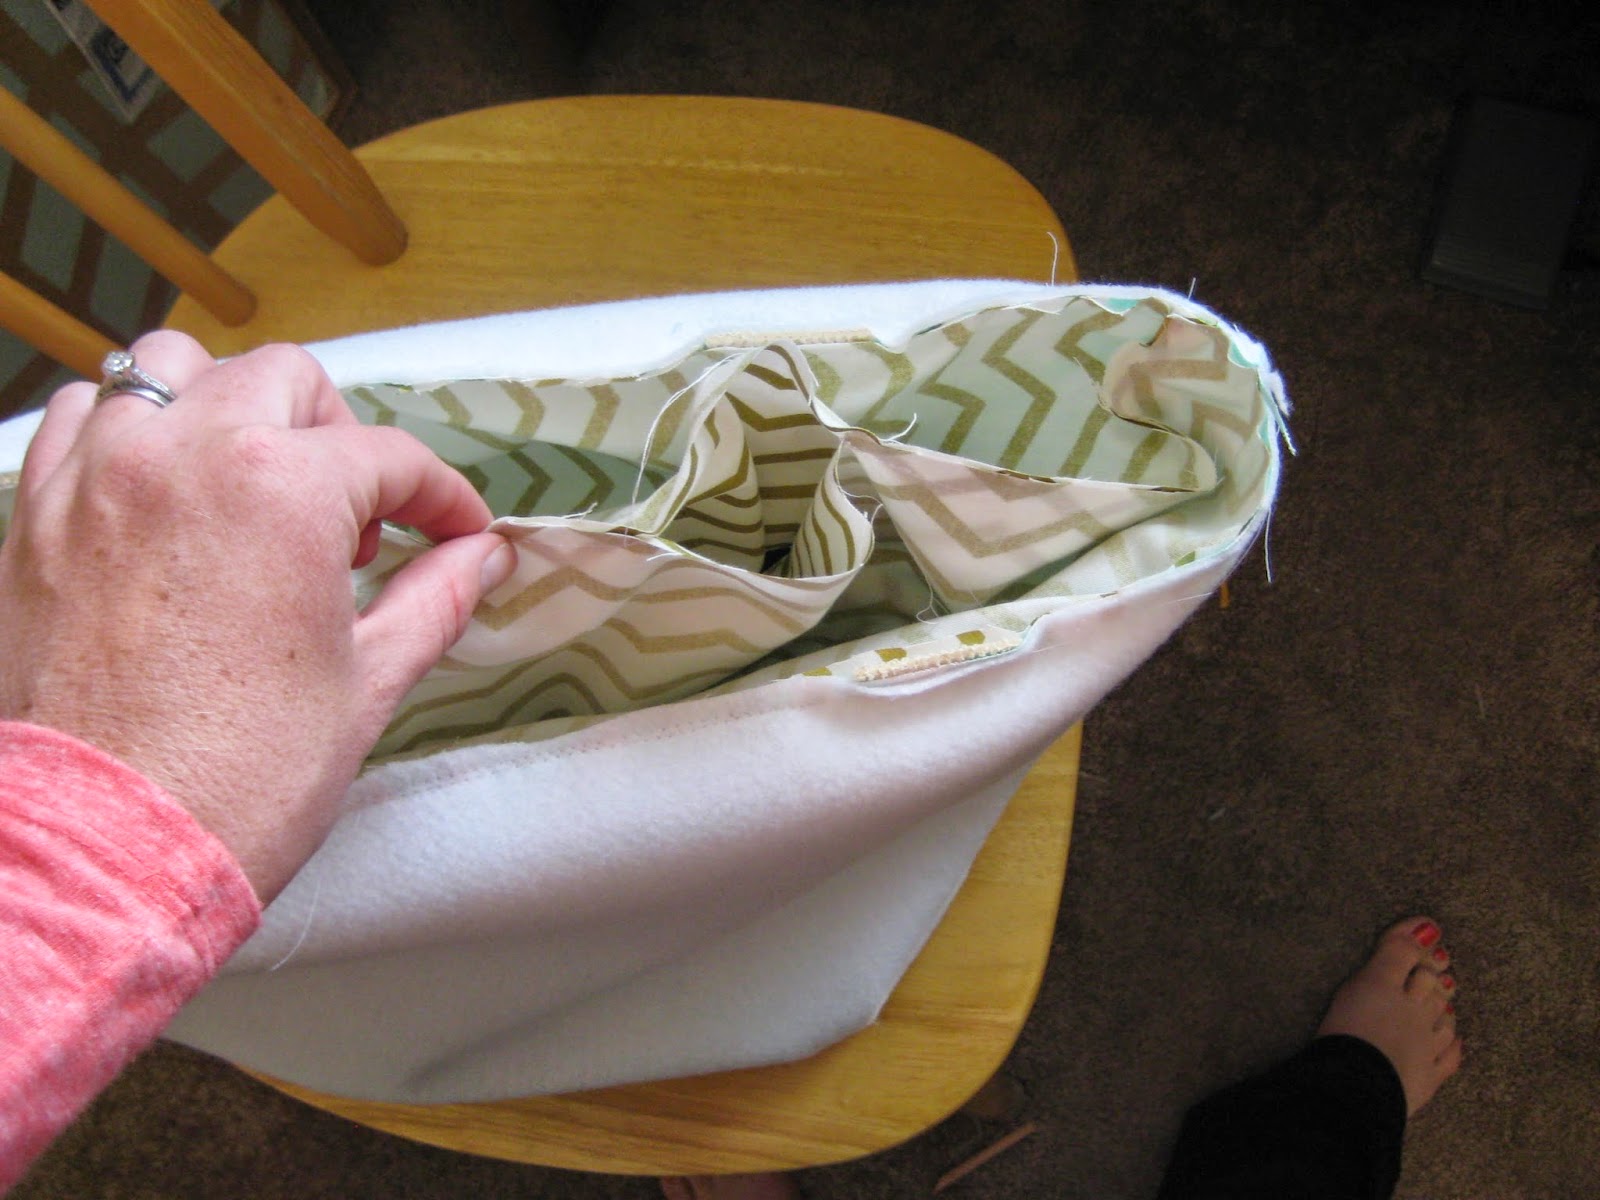
Now stick your hand in there and find that hole you made in the side of the lining.

And help your bag "birth itself". ;) Pull everything out of that hole.

When you're done it will look like THIS! You are alllllllmost done! Yay!

Now, sew that hole up that you left in the lining.

Another sideways pic...awesome.

Now these are the last two steps. You don't HAVE to iron the top but I find it easier. I also tend to iron the bag because that whole turning right side out thing kinda wrinkles it up. You are going to now place one last final seam along the top of the tote bag. This gives it a nice, clean, finished look.

So that you now have THIS!

AND YOU ARE DONE!!!!!
Congrats friend on your first tote bag!!!


So the giveaway! Considering I have um...a few of these bags myself I thought that I would give the bag shown here to one lucky reader. Yeah buddy! All you have to do is leave a comment with your favorite thing to do when you are feeling creative...or if you don't have a creative bone in your body...what your favorite color is. ;)
I will pick a winner randomly on Thursday morning and contact you with your address to mail this bad boy off to you!
Good luck friends!


I doodle, which is a lame form of creativity. But I also likemaking digital prints and invitations which is done Nerdy and technology version of doodling. So. Teal. I like teal. Cute bag!
ReplyDelete(I commented before, but it didn't seem to publish!) Super cute! I like to do lots of things crafty, but presently my favorite is (probably because I'm just now learning) knitting. I'm making a pair of socks and a baby blanket right now.
ReplyDeleteI like to create paintings. Or try to. And pink. :)
ReplyDeleteI scrapbook. When I have time. Ahem. (LOVE your bag! Maybe I should learn to sew?) ☺️
ReplyDeleteI wrote out a whole long post and then...it disappeared. In any case, I like to write. Although I've certainly had no time to do much. as for colors. ALL OF THEM. But only if they are in Rainbow Order. Because I'm neurotic like that.
ReplyDeleteI love to knit! I do wedding afghans, baby blankets, bags...no baby hats (I knit too loosely and can't get them small enough!) I also love to sew and mostly baby changing pads and burp diapers....I used to make dresses for my daughter and granddaughters. I also "dabble" at making some jewelry!
ReplyDeleteWhen I feel creative, I love trying out new (easy) sewing tutorials (Thanks for this one!) I also like to knit hats on my new round loom I got for Christmas. :)
ReplyDeleteThis is a great tutorial for what I already know is a wonderful bag! I delayed commenting to avoid entering since I already have one.
ReplyDelete